Havasupai Part 2: Revisiting Mooney Falls and Exploring Beaver Falls

Mooney Falls

~ 3 Miles from Supai Village

The descent to Mooney Falls requires ducking through a narrow, low sandstone tunnel carved into the cliffside, followed by cautious navigation down eroded and slippery sandstone “footholds” to the ladder far below.  While there are chains bolted into the rock for handholds in the most exposed sections, even with them, it feels a bit sketchy. The new wood ladder was slick with mud and mist, and its rungs were spaced wider than a comfortable leg stretch for me. With 6 years of rugged hiking, scrambling, and the occasional canyoneering adventure in Utah under my belt, you’d think I’d have less trepidation navigating this than I did in my younger years. But still, it gave me moments of pause. (On the way back up, I saw a toddler and a young boy scramble ahead of their parents up the cliffside. Yikes!)

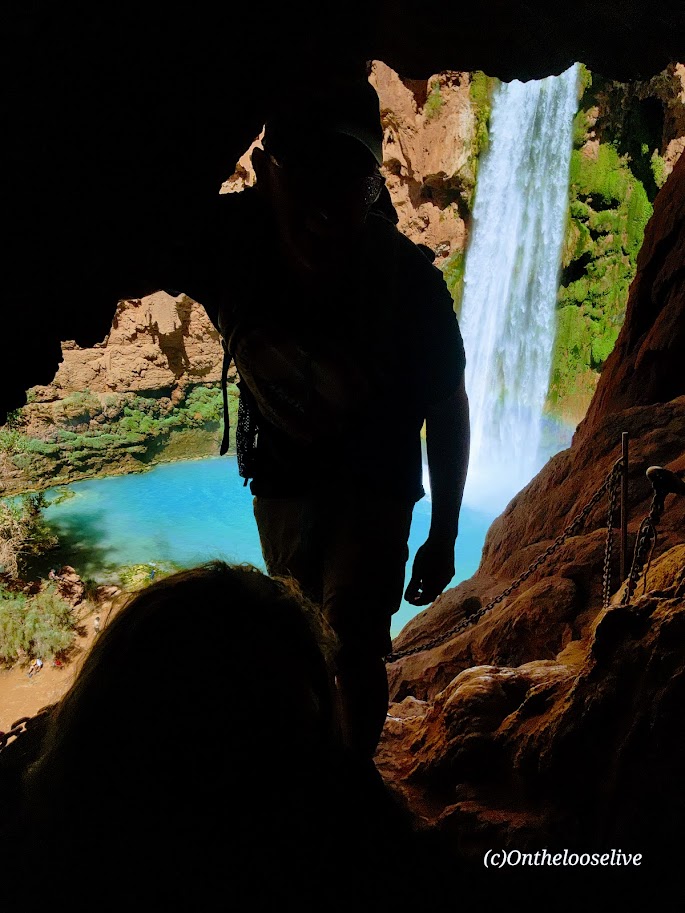
The power of the waterfall and the amount of mist the rushing water created were tremendous! The sunlight through the mist caused a magical effect in my photo on the right.
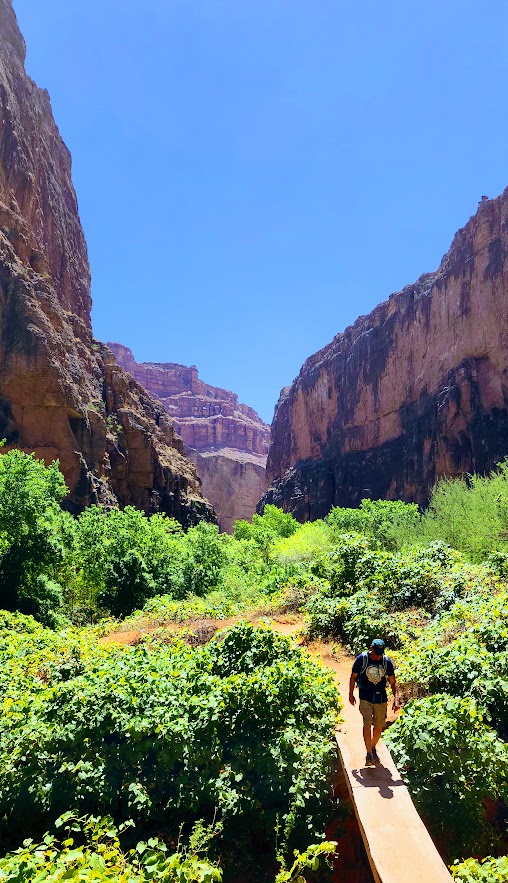
Beaver Falls

~3 Miles from Mooney Falls

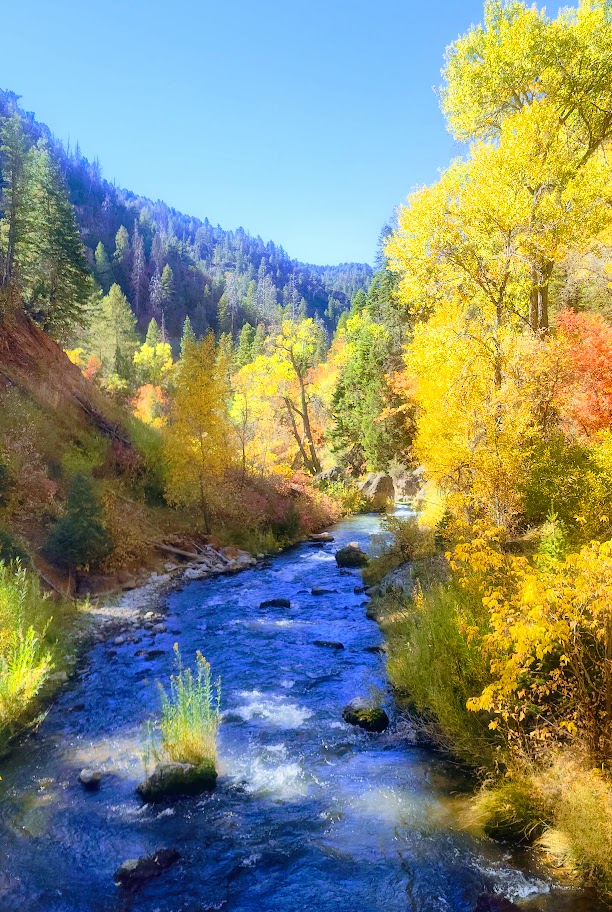
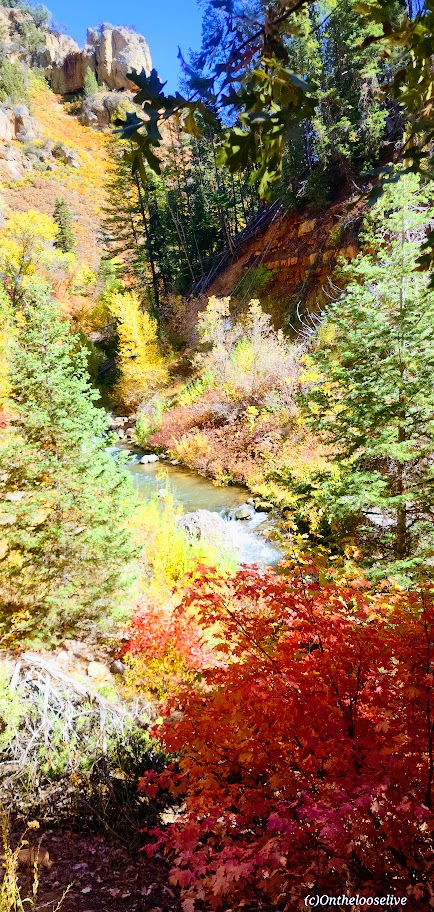
I’d never ventured beyond Mooney Falls before—there was never enough time. So I was especially grateful for the chance to explore further on this trip. The 3-mile hike from Mooney Falls to Beaver Falls is both enchanting and engaging, winding through a lush corridor of vines and trees along the turquoise creek. It feels like stepping into a jungle, with hidden oases revealing themselves around every bend.

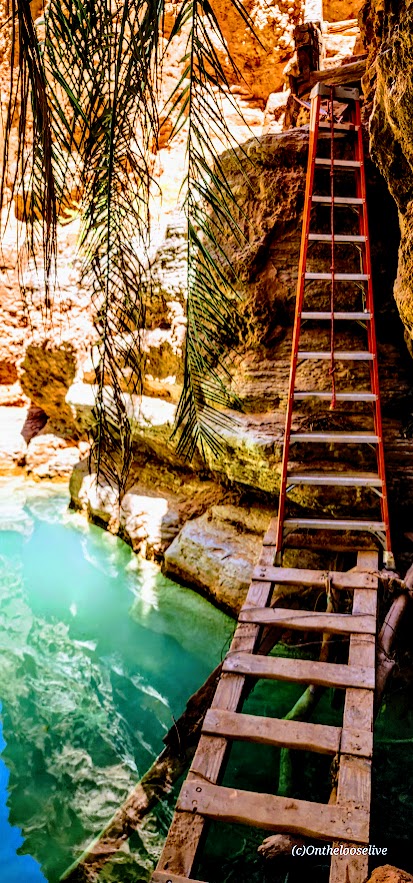
After a few refreshing creek crossings, the trail leads you through a striking sandstone archway to a short make-shift mini-bridge water crossing, followed by a ladder cliff climb. Thankfully, the footing here was drier and more stable than the slippery ladder at Mooney Falls.

Beaver Falls was truly stunning—cascading tiers of turquoise water —but it was also crowded. I hardly took any photos. A brief moment of uninterrupted zen there below.

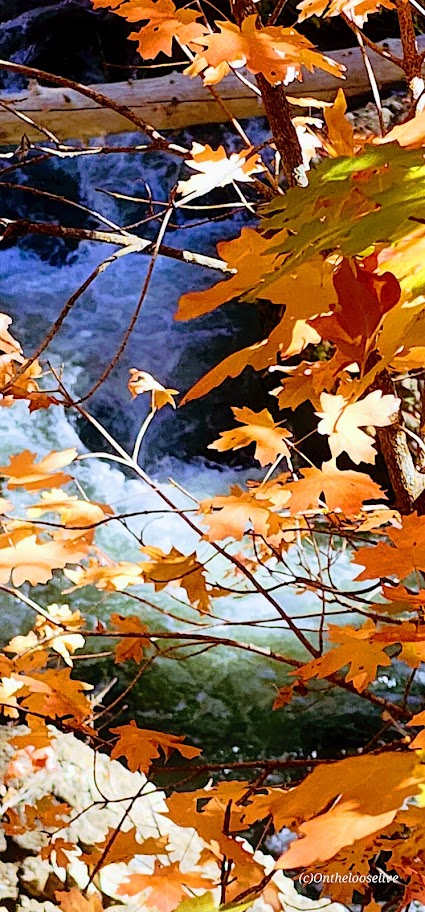
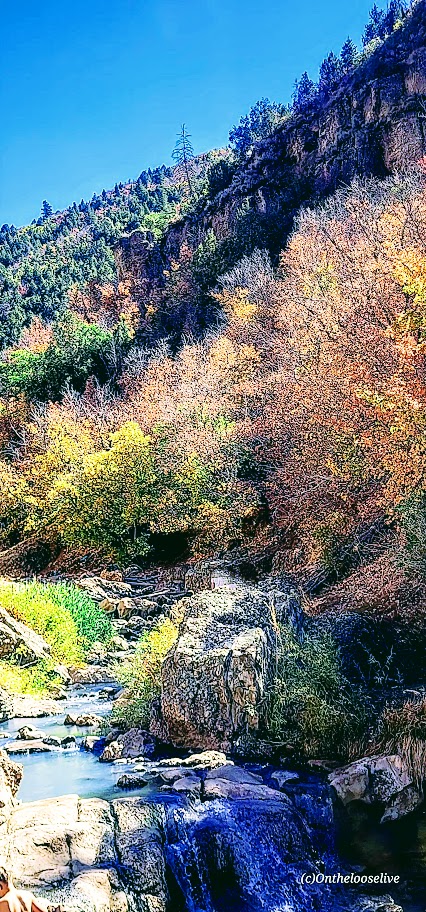
Thankfully, there were plenty of quieter “private” oases along the way, perfect for a peaceful dip or simply taking a moment to soak it all in. Beaver Falls is absolutely worth it, and the hike to it is fun—just be sure to get an early start if you’d like to experience it in solitude.

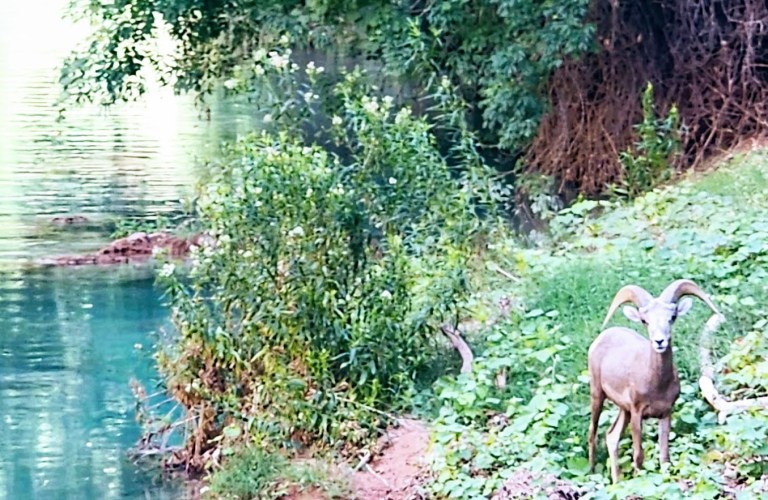
On the hike back, it was nearing critter hour. Much to my surprise, a bighorn sheep was just off the trail, seemingly scouting out a peaceful spot by the water to settle in for a nap. I had no idea that there were big horn down here!

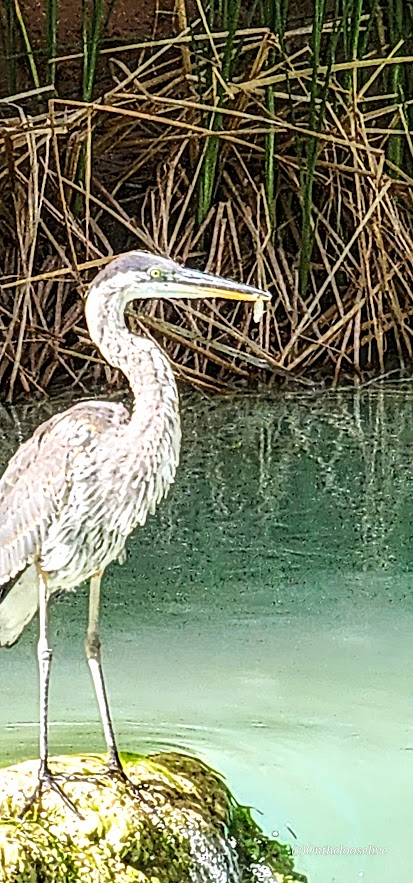
Closer to the campgrounds, I spotted a blue heron, focused, mid-hunt—clearly having some luck with its evening catch. Pics are a bit blurry due to distance.

Leaving Eden

We started our return hike from the village just after dawn, hoping to beat the heat. Fortunately, most of the trail remained shaded until the final climb out of the canyon, which is fully exposed. Fortunately, there are a few rocky overhangs along the way—perfect spots to catch your breath and escape the unforgiving sun for a moment.

This adventure was nothing short of epic. I felt a pang of sadness as it came to an end, but also immense gratitude for the chance to return (thanks to my friend Bernie for securing the permits) and the opportunity to explore more than I ever had before. Among all my adventures near and far, the exquisite beauty and spiritual essence of Havasupai will forever hold a special place in my heart. I’ve never experienced anything quite like it. It remains one of my all-time favorites.

Happy Trails!

Leave No Trace!

Bloods Lake Trail, A Short, Pleasant Park City Trail. Beware the Parking Sticker Shock!

Distance: ~3 Miles

Elevation Gain: 462 FT

Difficulty: Easy +, depending on your fitness level and altitude acclimation

Elevation: 9,174 – 9,519 FT

Named after the Bloods family, a pioneering family who homesteaded the area (not for what’s circulating in your veins or the lake color), the Bloods Lake trail is a short, pleasant stroll through the woods with a gradual incline on the smooth terrain of a well-groomed trail (trail runnable).

I wanted to make this shortie longer, but there was far too much snow beyond this lake. If you arrive after snow melt or have snowshoes, you can continue on to Lake Lackawaxen, named after its namesake river in Pennsylvania (2.6 miles, 1 way), Clayton Peak (2.7 miles, 1k FT elevation gain, 1 way), and Peak 10420 (2.5 miles, 1 way). Even if you hit them all, you won’t be able to get much mileage here.

This area is part of the Bonanza Flat Conservation Area, which was saved from development in 2017 thanks to a collaborative effort of various organizations and individuals. While that is indeed something to celebrate, they are recouping their costs aggressively, presumably to “manage increasing use, reduce congestion, and protect the area”. This is the most expensive trailhead parking scheme I have EVER encountered. They charge by the hour! It’s $5 per hour on weekdays and $8 per hour on weekends. Apparently, those who are privileged enough to live in the 84060 Park City zip code can apply for a free parking permit.

I paid $16 in advance, hoping I would make it to Clayton Peak and back. Deep snow stopped me at Bloods Lake, so I finished my hike within an hour with no recourse for a refund. Was it worth $8, yes – $16, no. As you can tell, I find this fee system utterly obnoxious. Though the silver lining is that it does motivate you to keep a fast pace, which I like- lol.

Getting there: The trailhead is one of several hiking trails along the super scenic Guardsman Pass.

Notes: Parking fills early on the weekends! Exorbitant hourly parking fees ($5 per hour on weekdays and $8 per hour on weekends)!

Happy Trails!

Stave Springs to Observation Point, Zion—Take the Hike Less-Traveled for an Engaging “Angel’s Landing-Like” Experience Without the Crowds

Distance: 9.3 miles

Elevation gain: 2k

Difficulty: Easy to moderate, depending upon your fitness level

This is definitely one of the more engaging official trails in Zion and now one of my favorites. From the trailhead, it begins as a tame, wide-open, flat route.

After a mile or so in, stop and look back for a glimpse into a dark canyon below.

As you continue along the trail, you’ll be treated to distant views of Zion, but don’t forget to watch your step as you descend the rocky trail into the lightly forested valley.

After reaching the other side of the valley, the climb will begin in earnest along the remnants of a concrete trail, zigzagging up to higher ground. It’s a friendly grade and easy terrain for fast hiking or trail running. It’s reminiscent of Walter’s Wiggles on Angel’s Landing, but the big difference is that you’ll likely have it and most of the hike from Stave Springs all to yourself!

This was my favorite part of the hike—a great workout with great scenery! (The picture above was taken on the return trip down.)

Once you reach the zenith, the views into Zion Valley are spellbinding, but you’ll want to keep your eye on your footing as you traverse along the slim cliff rim. (If you’re subject to vertigo and have a strong fear of heights, this might not be the hike for you.)

As you approach Observation Point, you can see Angel’s Landing below and across from you, a very cool perspective! This hike doesn’t have the rugged, chained, cliff-hanging social media over-posted appeal and crowds, and that’s exactly why it appeals to me.

Looks like angels are landing on Angel’s Landing. The picture above is taken from the trail along the rim. How dangerous is it? Might depend upon whom you’re with… In 1997, James Bottarin was accused of pushing his wife, Patricia Bottarini, off the cliff to her death here. Choose your hiking (and life partners) carefully!

Yes, Observation Point Views are grand, but in my opinion, they are no better than what you see en route, so you can always skip the last 1/2 mile or so if you want to skip the crowds.

There are two downsides: one is the long drive to reach the remote Stave Springs Trailhead, which is actually an upside, as it keeps the humans away. The second is the crowds you’ll encounter at Observation Point, who have taken the easier, shorter, less engaging route from East Mesa. It can be a shock to the system, especially after enjoying the splendid solitude of the Stave Springs route. Select the hike that suits you, but please note that both trailheads have limited parking, so arrive early to secure a spot.

If you’re lucky, you might encounter some of the locals.

Driving back through Zion and capturing golden light is always a delight.

Getting there: Use the Zion Ponderosa Ranch Resort address for your GPS: Twin Knolls Rd, Orderville, UT 84758. Once there, signs will direct you to the trailhead. It’s a gravel road with a couple of rough spots by the small parking area. High clearance recommended.

Happy Trails!

Fifth Water Hot Springs, Uinta-Wasatch-Cache National Forest

Fifth Water Hot Springs has been on my radar for years. I’ve seen the gorgeous pictures on IG and FB, but I knew the experience would be more like an “attraction” than a hike, so I haven’t gone out of my way to check it out. On this adventure trip, it was on my way with daylight to burn. While its popularity is a major deterrent, I decided to brave the “crowds” and finally see it for myself.

I arrived midday. (Yes, it was a mistake, but it was either now or never). (If you can, go at dawn.) The parking lot was full. People were parked at risk along the roadside. Luckily, I found a pullout a mile back and didn’t get towed or ticketed. (However, I did see a tow truck getting busy on the way back.)

Lots of people (too many) on the trail and in the pools, as you’d expect. It definitely has more of a water park vibe. I guess that’s to be expected with an easy, short, 4.5-mile roundtrip hike near a big city (SLC).

The trail to the pools along the stream is especially lovely in the Fall.

As you get closer, there’s a slight smell of sulfur that seems to dissipate when you reach the pools.

The waterfall at the end was a nice surprise.

I satisfied my curiosity. Would I go back? Only if I can make it to the trailhead at dawn.

Notes: The road is closed in the winter. Info here. Harmful bacteria may be present in the hot springs. Info here

Getting there: Take the US-6 towards Price and make a left on Diamond Fork Road.

Spectacular Shadow of the Minaret, Inyo National Forest, Mammoth, CA.

The Shadow to the Minaret (Agnew Meadows to Devil’s Postpile) route packs so much breathtaking beauty into a challenging 17-mile hike. Backpacking might be the best way to experience it, or you can choose a waterfall or any of the 7 amazing alpine lakes (Olaine, Shadow, Ediza, Iceberg, Cecile, Minaret, and Johnston) along the way as your destination for a shorter out-and-back hike. I wanted to see as much as I could in the limited time I had in the area, so I did it as a day hike.

Miles: 17, or create your own out-and-back adventure (~7 miles RT to enchanting Ediza Lake with only 400 feet elevation is an excellent option for a shorter day hike and is popular for good reason ).

Elevation gain: ~2.529

Difficulty: Hard/Challenging, especially for a day hike

From Agnew Meadows, you’ll encounter Olaine Lake first, then the gorgeous tiered Shadow Creek Falls, Shadow Lake, and dazzling Ediza Lake.

Enchanting Ediza Lake

Take the trail above Ediza Lake for a glimpse of dramatic Iceberg Lake.

From there, if you wish to venture beyond, you’ll have to climb/scramble the rugged loose scree and talus cliffs to reach Cecile Lake.

Note that I wouldn’t recommend attempting this if snow is present. There’s an argument if you’ve come this far to keep going. You’ll need to boulder hop for a half mile or so around Cecile to get to the slippery, rugged drop into Minaret Lake.

Scaling Iceberg’s cliffs, boulder hopping around Cecile, and “sliding down” the loose sandy “trail” into Minaret can be quite time-consuming despite these sections’ short distances. (Some AllTrails hikers reported it taking 2 hours for these miles 9 & 10 .) I made it up Iceberg in 20 minutes or so, but I am accustomed to scaling rugged, steep landscape. The boulder hopping around Cecile Lake was slow going for me, and the slide down into Minaret was even slower as my knees did not appreciate the vertical angle.  

From Minaret to Devil’s Postpile, it’s all downhill with some rocky sections. Highlights include a wonderful, wide, terraced waterfall, and close to the end, a cool canyon area with a stream going through it, and finally, Johnston Lake.

Notes:

Get to the Agnew Meadows trailhead before 7am for self-drive and parking, or take the shuttle.

Equipment: Would poles have helped on the descent to Minaret? I’m not sure. Personally, I prefer to have my hands free. Prophylactically for me, knee braces would have been a good call, but not needed until the Minaret descent. If you’re going over 12 miles, I’d recommend hiking shoes. Much as I love hiking in light trail runners, my feet were beaten up/done at the end of this 17-mile day.

Was it worth it? ABSOLUTELY! I hope you can see why.

Happy Trails!